Parts of a Butterfly
It is better if you recognize the parts of a butterfly. In this way, you will know what parts you should
include to properly construct/draw a butterfly. Some parts can be disregarded, but some should always
be included.

It is better if you recognize the parts of a butterfly. In this way, you will know what parts you should
include to properly construct/draw a butterfly. Some parts can be disregarded, but some should always
be included.
The visibility and obviousness of some certain parts of a butterfly depends on its angle or position and
colors/shades.
The lines on the wings should be curved, especially on the tips where it connects to the side edges of
the wings. The counts of the interspaces are usually 8 to 12. This can be adjusted if you are going to
draw a butterfly, to avoid the struggle of properly placing and distributing the curved lines (just
remember that it should be at least 8).
The segments and lines of the costal area are often disregarded, since it usually contains a dark (usually
black) color and it is hardly distinguished on most butterflies.
The discal cell is always present to any butterfly, but there are cases in which it is hardly seen (in rare
case, completely hidden due to the folds of the wings, such as the long-tailed skipper's wings). But if
the discal cell is visible, it usually occupies a quarter half of the wing (halfway across the wing).
Atrophaneura Semperi

This black butterfly is an uncommon sight for butterfly collectors and breeders. Atrophaneura semperi
usually lives in thick forests of continents with fairly hot and rainy climates (lands with tropical
climates). It belongs to the family of papilionidae, and this butterfly is rarely seen in butterfly gardens
and galleries but can be found in Indonesia, Philippines and other parts of Asia. They are commonly
referred as batwing butterflies.
The primary colors of this butterfly are a combination of black and red. Their bodies are covered in red
fur with parallel sections of black on the abdomen which is a good combination for its black legs and
long black antennae. There are spots of black on the sides of its body that are aligned with black
segments at the underside of its abdomen. The wings of athrophaneura semperis are mostly black.
Some have white detailing/sections on their forewings, and their hindwings contain some short broken
sections of red markings. The hindwings of females have a faint color of pink prints instead of red. The
edges of their hindwings are ruffled in an organized manner. Some of their kind contains color
markings on the underside of their wings only, and just plain black on the upper side.

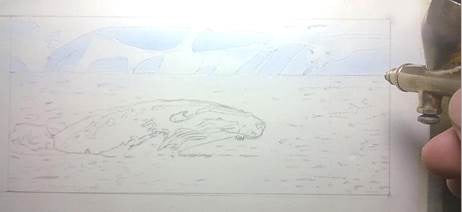
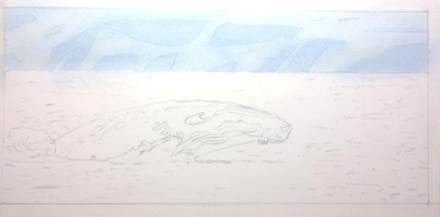
• Make a rough sketch of the butterfly.
Establish the position and the sizes of the parts of the butterfly. Just simply sketch the body and the
angle of the wings without its wavy edges.
The hindwing should overlap the forewing since you are drawing the view of the underwing.
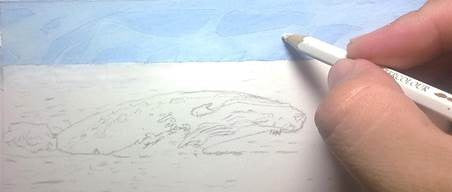
• Refine the outlines of the shape of the butterfly and establish the details.
Re-outline the shape with better and smoother outlines. Establish the soft ridges on the lower edges of
the hindwing including the short wingtail. Draw the print on the batwing's hindwing, and make an
outline of the abdomen's markings.
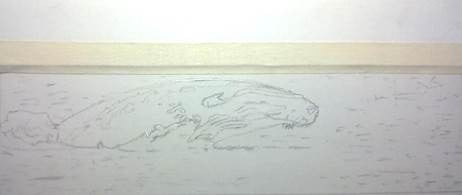
The marking on the butterfly’s forewing is like a contour outline of the wing's curvy edge. There is a
continuous curvy marking that resembles the waves of the lower edge, with its spikes/ tips filling the
spaces of the wing's protruding tips including the wingtail.
The wing print of the forewing has two (connected) rows, occupying the lower half of the forewing. On
the first three interspaces (coming from the inner margin), the tips of the first (upper) row are
connected to the lower row, then the print breaks (the upper row breaks first) into irregular mark/dots
(one mark on each interspace).
Establish the position and the sizes of the parts of the butterfly. Just simply sketch the body and the
angle of the wings without its wavy edges.
The hindwing should overlap the forewing since you are drawing the view of the underwing.
• Refine the outlines of the shape of the butterfly and establish the details.
Re-outline the shape with better and smoother outlines. Establish the soft ridges on the lower edges of
the hindwing including the short wingtail. Draw the print on the batwing's hindwing, and make an
outline of the abdomen's markings.
The marking on the butterfly’s forewing is like a contour outline of the wing's curvy edge. There is a
continuous curvy marking that resembles the waves of the lower edge, with its spikes/ tips filling the
spaces of the wing's protruding tips including the wingtail.
The wing print of the forewing has two (connected) rows, occupying the lower half of the forewing. On
the first three interspaces (coming from the inner margin), the tips of the first (upper) row are
connected to the lower row, then the print breaks (the upper row breaks first) into irregular mark/dots
(one mark on each interspace).

• Color the design of the wings.
The wing prints on the forewing is orange-red, so is the body/base. To be able to portray this properly,
use colors that can be a brighter and lighter value of red.
Use brown as the dark tone of red. Apply brown color to the sides and portions that should be darker.
Color the edges of the interspaces (occupied by the wing print).
Fill the area (wing print) with red. Apply more pressure to your hand strokes as you color the darker
areas, and lighten your hand strokes on the areas that should be brighter (mid-portions of the
interspaces).
Burnish the entire wing print with orange. Overlap the red (and brown) with heavy strokes of orange.

• Apply the same rendition of red value to the body.
Use short signatory line strokes to contour the texture of the body. Apply brown on the farther sides
and fill the rest (overlapping the brown) with red short lines. And just like what you did with the red
wing print, burnish the entire body with orange.
• Define the primary parts and darken the black marks of the body.
Establish the black bar marks at the segments of the abdomen's lower area and mark the black spots in
each segment (one spot per segment) on the side. The head features (antennae, proboscis and
compound eyes) are also black.

• The color of the prints of the farther wing should be darker.
This can be done by applying more brown before coloring the area with red (exclude the orange).
• Shade the other wing and the remaining portions of the hindwing.
The remaining areas of hindwings and the forewings are black. The discal cell on the hindwing has line
marks that are continuations of the linings dividing the wing interspaces. Each interspace contains a
white bar, starting at the lower lining of the discal cell and half-way to the edge of the forewing. The
lining on each interspace (parallel to the line divisions) become visible because of the white bar.
Define the other lines included in the forewing and thicken the outlines of the interspaces, shade the
near surrounding areas of the lines and the up to the far edge of the forewing, leaving the middle area
of each interspace as is (to define the bars).
• Smear the shading.
Carefully distribute the shades on their respective areas. Slightly smear some of the shades to the edges
of the white bars.

• Darken the areas of the wing that should appear deeper.
Apply another layer of shade to the farther and deeper areas (conveying the contour shape/perspective)
of the wings.
• Do the same process to the other (farther) forewing.
The shade of the farther wing should be darker. After smearing the first layer of shading, re-darken the
areas with another thick layer of graphite/charcoal (whichever medium you used). Smear a thin layer of
shade to the white bars of the farther wing (using the stain of the smudge stick only).
• Make the final retouches to finalize your drawing of the batwing butterfly.
Re-define the main outline and cast a shadow with the used smudge stick (to produce a fair gray
shade).

Download the complete copy of this book.